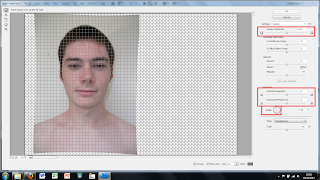
To create a 3D model of our own heads on 3DS Max we first had to take pictures of the front and sides of our heads. Once we had suitable pictures to do the job we loaded them onto Adobe Photoshop to undo any distortion created by the camera. To do this, once the picture is loaded into photoshop, we used the lens correction tool found in the Filter, Distortion tool bar. This then brings up a new window as shown above. Then using the tools at the side such as remove distortion and the perspectives to remove any distortion that may have been made taking the picture. This is done as the person taking the picture may have had the camera at an angle and the camera itself slightly distorts the image. All of this is done by eye until it looks right to the user.

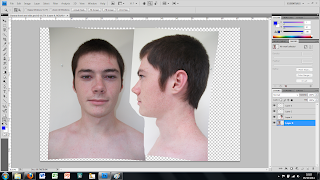
Once the lens correction has been applied to both the images they need to be put together onto the same canvas, this is easily done by dragging 1 image from its window to the window with the other image in. as the canvas size will be to small for the 2 images you need to change the canvas size. This is easily done by going into view then canvas size and changing the percentage size to 200 under the width row. This gives enough space for both the images next to eachother on the same canvas.

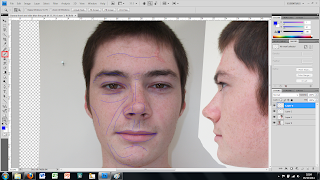
With both the images on the same cavas we then started to draw in some basic lines that follow the shape of our faces. For this we used the brush tool on the left hand side in a bright blue colour so that the lines can easily be seen.

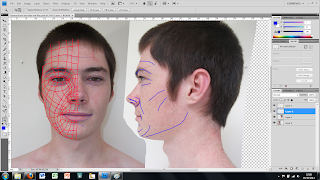
Finally, to finish modifying the images, we created a mesh over the top of half of the face using the brush tool but in red this time to contrast with the blue. This red mesh is more detailed and tries to follow the line of the face trying to mimic the direction of the muscles in the face. This should make it easier to create the 3D image as all the lines should more or less be in the right place before we'ev even begun.
No comments:
Post a Comment